Low and slow, as every pitmaster knows, is the ideal burn for getting the best from your smoker.
What if we told you there was a way to get that perfect slow burn without constant adjustments?
In this guide, we’ll show you a 15-minute set-up technique that will hold a perfect low temperature for up to 18 hours.
Welcome to the Minion Method.
Why We recommend the Minion Method for low and slow cooking
The original Minion Method was born out of necessity.
Feeling the need for speed at a barbecue competition, Jim Minion came up with his own lighting method.
Filling his new Weber Smokey Mountain Cooker with charcoal briquettes, Jim added a small number of hot coals on top. He then used the bottom vents to control the airflow into the cooker.
Jim’s lighting method keeps the temperature in that magic 225-250°F range. It also gives you burn times of up to 18 hours.
The benefit of the Minion Method is that it allows you to quickly fire up your smoker and get it burning low and slow.
Using this simple technique allows you to almost “set and forget” your charcoal smoker. No need for constant adjustments or messy refueling unless you are doing an extra-long cook.
You can get that perfect smoke and still watch the game!
Pros:
- Perfect for low and slow smoking sessions of between 6-18 hours
- A “set and forget” that you won’t have to keep adjusting
- You can start smoking in just 15 -30 minutes
- No need for refueling
- Can be used for smoking overnight
Cons:
- Burns low and slow, so it’s no good if you need temperatures of 325°F and up
- Some people claim that the charcoal briquettes flavor the food
The Minion Method step by step guide
Compared to traditional starting techniques, the Minion Method is quick and easy. You can get your smoker up and running in as little as 15 minutes.
We’ve broken it down into four easy steps to make it as simple as possible.
1. Fill your smoker’s charcoal chamber

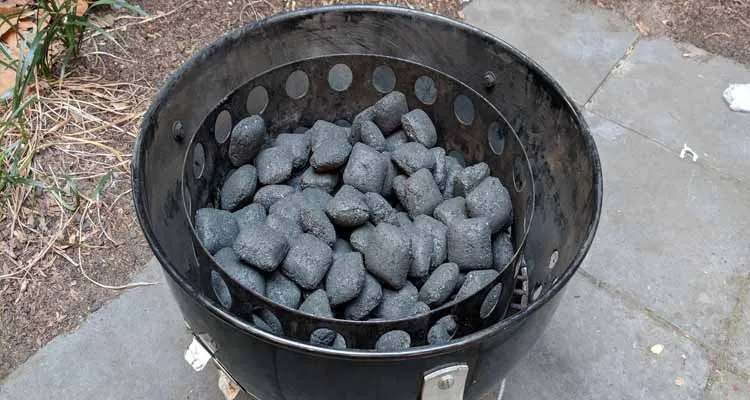
- Fill your charcoal chamber with unlit briquettes. We share some tips on the amount of charcoal to use in our separate post.
- Once you have a deep even layer, make a well in the center, so there is space for your starter coals
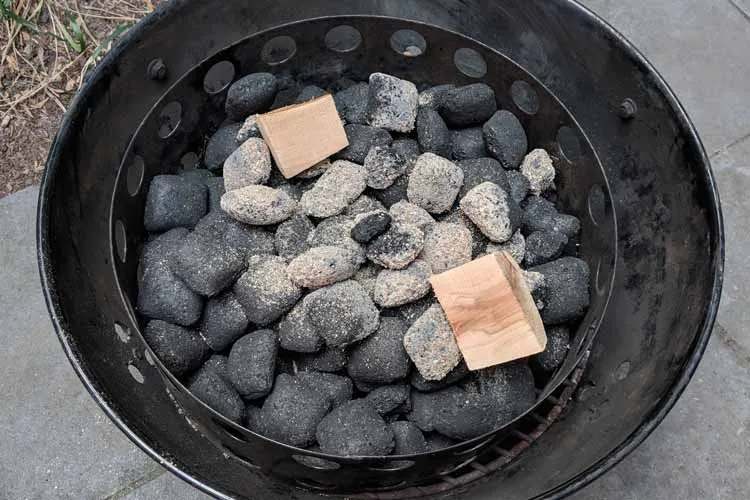
- Put your chosen wood chunks on top of your unlit briquettes
- Open both top and bottom air vents
2. Light your starter coals

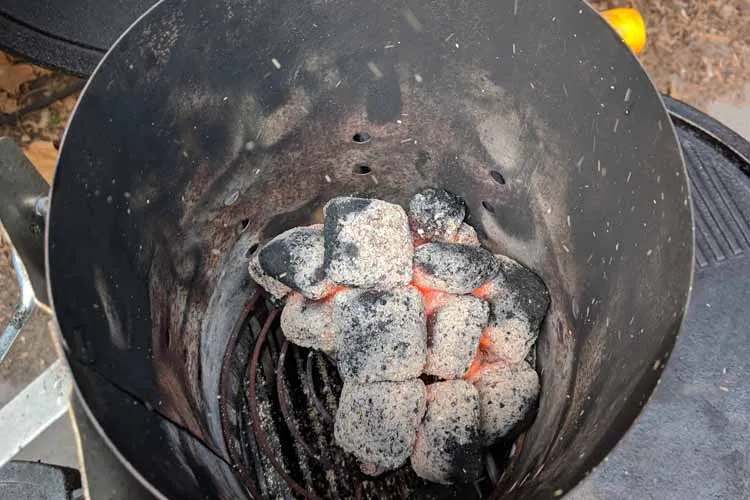
- In Jim’s original method he started his coals burning in a chimney starter
- You can also get your starter coals burning with a blow torch or similar device
- Once all the coals are about 70% covered with grey ash, add them to your smoker
3. Place the lit coals in your center well

- Fill the center well you made earlier with the burning starter coals
- As your starter coals burn out, they will light the briquettes around them. This keeps your smoker’s temperature steady
4. Adjust your vents
.jpg)
- When your smoker’s temperature reaches 200°F, close your top and bottom vents to 25%
- Check the temperature until it gets to around 225-250°F
- Adjust your vents as necessary until the temperature settles.
The position of your vents will depend on a number of factors including weather conditions and how much lit charcoal you started with.
Common questions
The Minion Method is simple, but you’re bound to have a few questions.
Can you use the Minion Method with any grill or smoker?
Jim pioneered his Minion Method using a Weber Smokey Mountain Cooker, but it works well with any cooker and smoker that has a charcoal basket. Just make sure the coals are at the right distance from the meat.
You’ll need to experiment with your own grill or smoker. Then adjust the method to suit its size, airflow, and leakage.
Should you use lump charcoal or briquettes?
Both briquettes and lump charcoal work with the Minion Method. Each has its pros andcons, and there are a few differences that you should note:
- Lump charcoal is not uniform. You’ll need to pack it in tightly to get a consistent burn.
- Charcoal briquettes produce more ash. This can smother your fire, so keep an eye on your thermometer.
Won’t burning unlit briquettes affect the taste?
To help them burn consistently, briquettes can contain coal, limestone, cornstarch, and borax.
Some pitmasters have reported an ‘off’ taste to meat cooked with the Minion Method, supposedly because of the unlit charcoal igniting during the cooking process.
There isn’t much evidence that using briquettes for the Minion Method does flavor meat, with only a few pitmasters reporting it.
However, if you are worried that using briquettes could affect how your meat tastes, use lump charcoal instead. It works just as well.
Can you use wood chunks or logs instead of charcoal?
You can use wood chunk or logs, but using them defeats the main benefits of the Minion Method.
Before cooking begins, wood needs to be burned down to hot coals, so it’s not quick. It also needs to be continuously replenished, so it’s not easy or “set and forget.”
The best fuel to use with the Minion Method is charcoal.
Popular variations of the Minion Method
Since Jim’s invention of the Minion Method, other pitmasters have taken it on and changed it to suit their personal style and equipment.
Here are a few variations on the Minion Method that you might find work better for you than the original.
Soo’s Donut
Soo’s Donut basically uses the same steps as the original Minion Method but with the following changes:
- Instead of a well, dig a hole in the center all the way down and about 8″ wide. This forms the “Donut”
- Instead of laying your wood chunks on top of your unlit coals, bury them at different distances from the center
The Fuse
The Fuse is best suited to larger cookers or smokers as they tend to run hotter.
It’s also one of the best ways to setup a Kettle grill for smoking.
Using The Fuse method lets you keep that temperature down. Let break down how it works.
- Build Soo’s Donut from your charcoal and place a holder in the center to stop the coals from falling in the hole. A rock will work fine
- Remove an 8-inch section of your charcoal donut to create a “C” shape
- Remove the place holder from the center
- Place your wood chunks in a line on top of the “C” shape
- Half fill a chimney starter and engage your starter coals
- Pour your lit coals on one end of the “C” shape
The burning coals will now slowly ignite the rest of the “C” shape, just like a fuse. This produces a low and even heat over a long period.
The Pyramid
This last one is pretty simple, even by Minion Method standards. Build a pyramid of coals and place a paraffin cube under the top coal.
Once the top coal is lit, it will slowly ignite the rest of the pyramid. The Pyramid Method is slow to start but keeps a nice even temperature.
Time to experiment!
The Minion Method is a great way to ensure you get that slow and low burn you’ve been looking for.
Using the four easy steps above will have your smoker up and running in around 15 minutes, and you can experiment with its different variations to find one that suits your cooking style and equipment.