Brisket is notoriously difficult cut of meat to master.
Many amateur pitmasters have turned a 4lb brisket into a 4lb hunk of beef jerky.
You shouldn’t let these horror stories put you off though. There is no greater accomplishment than slicing a juicy, perfectly cooked brisket after 12 hours tending to your smoker.
If you want to learn how to smoke a brisket, there’s no better teacher than Aaron Franklin, the owner of the world-famous Franklin Barbecue restaurant.
His brisket is so legendary that people willingly line up at 6:00am to queue for a taste.
In this guide we go through his whole process from choosing the brisket, trimming and preparing it to how to manage the fire during the long cook.
There is a lot of great advice whether you are smoking your first brisket or you’ve done this many times before.
1. The brisket – how to properly trim and add a rub to your brisket
The problem most people have with brisket is that it’s a tough cut of meat. This makes it perfect for low & slow cooking.
Great brisket isn’t about fancy rubs, mops, marinades or BBQ sauce.
Selecting the the right brisket from the butcher shop and preparing it properly will set you up for success well before you even fire up your smoker.https://youtube.com/embed/VmTzdMHu5KU?feature=oembed
Tips for Selecting a Brisket
While some people swear you need to buy Wagyu brisket, for practice cooks it’s fine to buy your brisket from places like Costco, Sams Club or asking your local butcher.
If you want to go straight to the good stuff, Snake River Farms sells top-quality American Wagyu brisket and delivers everywhere in the continental United States. Check out our full review.
- In the video series, Aaron is cooking the whole brisket (also known as a packer brisket). This means the flat and the point parts of the brisket are together.
- We recommend buying a whole packer brisket, which lets you have full control over the trimming process.
- When selecting your brisket look for marbling in the meat and a thick flat so the leaner part will cook at almost the same rate as the larger point.
- Look for USDA Choice, Prime or Certified Angus Beef
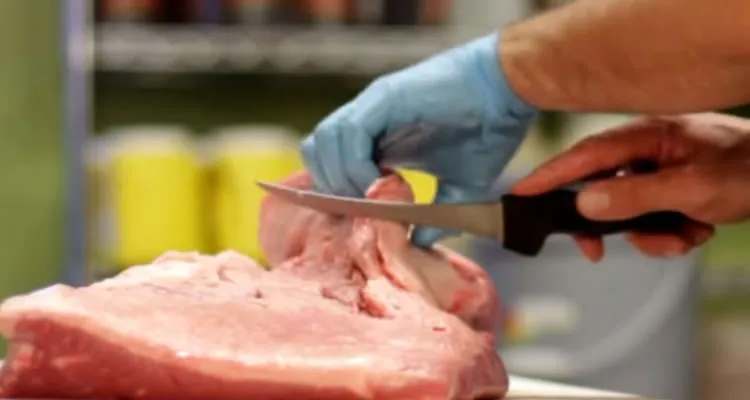
How to Trim a Brisket
- Use a good narrow curved boning knife for trimming the brisket (using a blunt knife is a good way to stab yourself).
- If you don’t trim any fat off the brisket it will taste too fatty, but trimming too much will make your brisket dry. Aim for around 1/4″ of fat.
- Brisket is much easier to trim when it’s still cold so trim it right after you take it out of the fridge.
- There is a thick membrane called the deckle that will not render out during cooking, you will you need to cut out (some butchers will have done this for you)
- Trim off any bits which are significantly thinner than the rest as they will cook too fast and burn.
- Think about where the heat will be coming from and how the brisket will be placed on your cooking surface. Areas that run hotter can have a little more fat to help protect the meat.
- So long as you leave around 1/4″ of fat and get a good shape don’t worry too much about trimming. Practice makes perfect.
Barbecue Brisket Rub
A lot of people use complicated rubs with chill powder, cumin and paprika on their brisket.
For true Texas style brisket you want to use even parts salt & black pepper. This simple style rub will still give you a great bark, while still letting the beef flavor dominate.
If you are wondering how to grind all that black pepper, the best option is to use a burr coffee grinder like the Cuisinart Supreme Automatic Burr Mill.
- The biggest mistake people make is putting on too much rub. You want to be conservative with the rub so that the meat flavor stands out.
- Make sure you swirl the mixture as you apply it, as the salt can settle to the bottom.
- Apply rub to the edges of the brisket, using your free hand to catch rub and push it back on.
- Let the brisket warm up to room temperature for an hour before putting it on the smoker for a more even cook.
2. The cook – how to manage the fire and treat the brisket while it’s cooking
While Aaron uses an offset smoker in these videos, the techniques he uses for preparing, smoking, and slicing the brisket can still be used if you are using a charcoal grill or smoker like the Smokey Mountain, converted Kettle or any other smoker.https://youtube.com/embed/pGZ39yYxeBk?feature=oembed
Positioning the brisket on your smoker
Fat side up vs fast side down is a surprisingly controversial topic. While how much this actually matters is up for debate, the right way depends on your smoker setup.
- Aaron recommends placing the brisket on the smoker fat side up.
- Depending on your smoker, if the heat is coming from below, consider smoking fat-side down to protect the muscle from drying out too much.
- Place the fattier point of the brisket closer to the fire. The extra fat will help insulate it.
- The flat end of the brisket should be closer to the smoke stack.
- Always use a water pan to help keep moisture in the cooking chamber and avoid burning.
How long to cook brisket
Ask any experienced pit master how long to cook a brisket and they’ll roll their eyes and tell you to cook until it probes tender.
Two similar sized briskets can have very different cook times based on a number of factors.
But none of this helps you if you’re planning a dinner party and need to have things ready by 6:00pm.
- A good rule of thumb for working out how long a brisket will take to cook is 1 hour and 15 minutes per LB (0.45kg) of brisket at 250°F (120°C).
For example: 10lb Brisket x 1.25 hours = 12.5 hours cooked at 250°F
Managing your brisket during the cook
- You need to keep a close watch on your smoker and keep the temperature steady.
- When the lid of the smoker is open you’re losing heat and smoke and it’s going to take a while to recover the heat. “If you’re looking you ain’t cooking”.
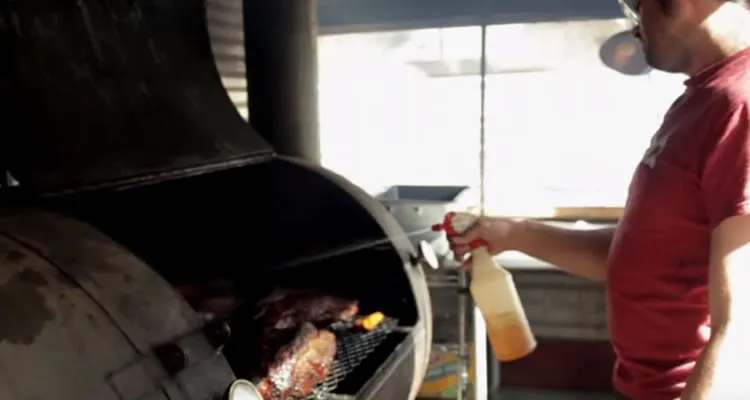
- Check it as little as possible, and if it’s looking dry consider spritzing it using a spray bottle with some apple juice or apple cider vinegar.
To ensure a steady temperature and avoid opening the lid too often, make sure you have a quality wireless thermometer setup with dual probes so you can measure the temperature of the smoker, as well as the internal meat temp.
- Try and avoid choking off the oxygen too much which can cause a ‘dirty fire’. This can create creosote (a thick, oily substance leftover by fire) which causes a bitter, over smoked taste.
- Wood choice for brisket is important, so try and avoid green wood or overly cured wood. Not mentioned in this video but elsewhere Aaron recommends using a very dry wood like Post Oak that has been cured for 9-12 months.
- You want to see clean heat coming out of the smoker and not a lot of smoke.
- Knowing your cooker and how to manage your fire only comes from a lot of experience so try and maintain an even temperature but don’t freak out if you don’t get it perfect on your first brisket.
How to Keep Your Brisket Moist
- Keeping a water pan in the smoker is the best way to retain moisture.
- After the first 2-3 hours start spritzing your brisket with water, apple juice, hot sauce or apple cider vinegar every 30 minutes to an hour. This helps keep it moist and stops it from burning.
- Some people use a liquid mixture to mop the meat but this causes a bunch of mess and can interfere with the bark on the brisket.
Wrapping your brisket and dealing with the dreaded stall:
- Wrapping the brisket in foil (the Texas Crutch) or butcher paper is an optional step that can help you in some circumstances.
- It can help the brisket retain moisture push through the stall faster.
- If your smoker is giving off too much smoke wrapping can also help.
- Wrapping in foil can help accelerate the cooking time if your guests are getting impatient.
- You can wrap the brisket after around 4-6 hours or you can cook for 11 or 12 hours and never need to wrap it. It all comes down to fire management and personal preference.
- When the internal temperature of your brisket hits around 150°F -170°F the temperature can stall as the brisket tightens up and squeezes out moisture. Patience is key.
.jpg)
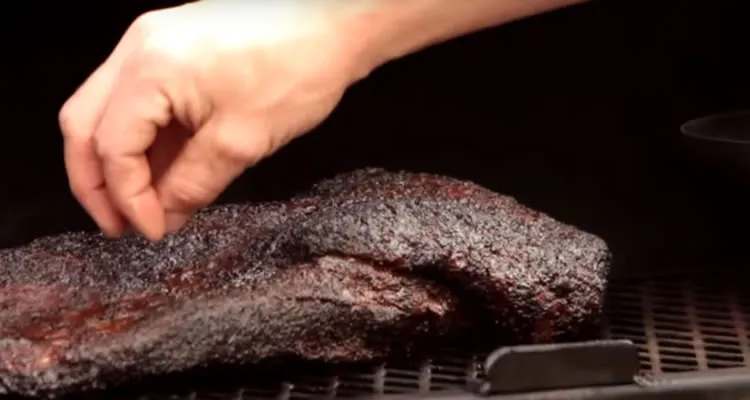
3. The payoff – wrapping, resting and slicing your brisket
Finishing your brisket
- When your brisket has a nice bark formed and is still soft and pliable you might want to wrap it.
- In this video, Aaron wraps the brisket with butcher paper. If you can’t find it in the shops you can get a roll of unwaxed butcher paper on Amazon.
- At this point, you might want to start preparing your BBQ sauce and sides
- Once wrapped, put the brisket back on at 250°F until done. Aaron uses the appearance and feel of the brisket to measure when it’s done but he has smoked thousands of briskets. We recommend using one of the leave-in thermometer reviewed here, and taking it off when it’s at an internal temperature of 195-203°F

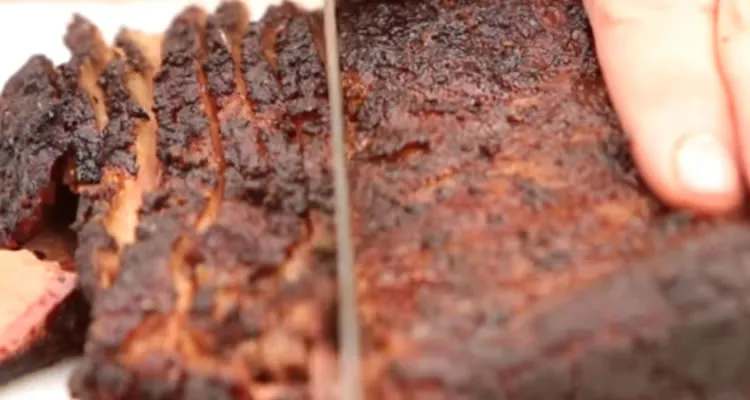
Slicing your brisket
- Once you’ve taken the brisket off the cooker and let it rest for about an hour you are ready to slice.
- The proper way to slice a brisket is to cut against the grain on the flat side until you get to the point. And then turn the brisket 90 degrees and then cut against the grain.
- Try and avoid scraping off the bark.
- Use a 12″ serrated knife or check out our breakdown of the best brisket slicing knives for more in-depth reviews.
- Cut each slice around the thickness of a big pencil on the fattier part and a small pencil on the leaner part.
- If you’re not going to use it right away leave the brisket whole and cut it just before serving so it doesn’t dry out. Make sure the finished brisket is wrapped in butcher paper, in foil and then a towel and hold in a cooler for a few hours.
- Brisket is a very uneven cut of meat. Some parts are fatty, some are lean some are thick and some are thin. That’s why it can take so long to master it.
You’re done! Time to relax and enjoy your barbecue brisket with a few drinks. And if you’re lucky enough to have leftovers, check out our guide on what to do with brisket leftovers.
And if you found this useful you should check out our review of Aaron Franklins MasterClass where he goes in to a lot more detail teaching you Texas style BBQ.
Advanced BBQ Brisket Techniques
If you’re still mastering the basics of barbecue brisket, you can probably ignore this next section.
The videos and steps above are a great introduction for beginners and will give you all the info you need.
Advice for Buying Brisket
If you’re cooking brisket in a barbecue competition, or just want to make the best brisket humanly possible, you need to understand how beef grades work.
In the United States, beef handled at a USDA-inspected facility grades their meet on the marbling and the age of the animal slaughtered. The three most common beef grades that you’ll see (from highest to lowest level of marbling) are:
- Prime – Highest quality and most intramuscular fat or marbling
- Choice – Most widely available, less marbling than prime
- Select – Leanest of the commonly available grades, not as juicy or tender
Each of these grades can be further broken down into Upper, Middle and Lower grades.
To give you a practical example, Certified Angus Beef, must be graded as Upper Choice
Because meat is graded based on the marbling of the ribeye, a totally different part of the animal, there’s no guarantee the brisket will be marbled in the same way.
However there’s a good chance meat from the same carcass will have similar marbling.
Aaron Franklin prefers to use Prime Angus, but due to the limited supply he also uses Upper Choice Angus beef.
Some other things to look out for include:
- Look for meat that is hormone and antibiotic free
- Certified natural and humane
What about Wagyu beef?
It’s a common misconception that Wagyu is a grade of beef. This is incorrect.
Wagyu is beef that comes from Wagyu cattle. While the type of beef originated in Japan, Wagyu cattle these days has often been born and raised in the US.
While most people picture the highly marbled A5 Wagyu style, plenty of Wagyu will actually resemble choice or prime.
With that out of the way, there’s no denying the prevalence of Wagyu brisket on the competition circuit.
You can generally expect more marbling, but more importantly, the quality of the fat is higher. This gives you better moisture.
If you want to give Wagyu a try, Snake River Farms are a very popular producer.
Cooking only the brisket flat or point
A whole packer brisket is going to weigh between 8 – 16 pounds, which is a lot of meat!
If you’re only cooking for a few people, this just might not be practical.
Many briskets will sell just the flat or point. Try and get the point as it has more marbling and will result in a more tender end product.
If you get just the flat you won’t get much marbling. These cuts are more commonly used for slow cooking in liquid.
Technique will be the same for cooking just the point, but allow for less time.
Using a Beef Brisket Injection
The advice above says not to use any kind of injections.
However, there’s no denying plenty of pro pit masters use a beef brisket injection.
Malcolm Reed from howtobbqright.com recommends injecting beef brisket because it “gives your meat more flavor and helps to keep it moist during and after the cooking process”.
Beef Brisket Injection Recipe
- Beef Base (1 heaping tsp)
- Worcestershire Sauce (1 TBS)
- Soy Sauce (1 TBS)
- Accent (1 tsp)
- Water (2 cups)
Heat ingredients together and mix then use a good meat injector to inject into your brisket before you add your rub.
Apply salt and rub the night before
If you can, it’s best to trim your brisket the night before you plan on cooking it. This way you can apply the salt and rub and give it plenty of time to work its way in.
The added advantage of doing this is that everything is prepared already so you can focus on getting your smoker going nice and early.
Keeping your brisket warm
Trying to time a brisket to be ready at the exact time you want to serve dinner is asking for failure.
Your best option is to aim to have it ready at least an hour early. When the brisket temperature gets to around 203°F, wrap it in foil an an old towel, and then place it in a beer cooler.
The faux cambro technique is a lifesaver.
- Before the meat is ready, pour some hot water into the cooler and close the lid to allow it to heat up.
- Dump the water out and line it with a few old towels to help insulate and in case of leaks.
This technique will allow you to keep meat safe for up to 3 hours.
Wrapping it up
One of the best things about BBQ is that there are so many different opinions.
But don’t feel like you need to stick to the videos and advice in this guide.
Some cook fat side up, others cook fat side down. Some use a mop, some use a spritz.
Want to add some bourbon to your water try? Give it a try! (And let me know how it goes in the comments below).